GMU:Max and the World/Felix Geith/KINECT USER PARTY/How I was able to work with Max MSP and the Kinect sensor: Difference between revisions
No edit summary |
No edit summary |
||
| (4 intermediate revisions by the same user not shown) | |||
| Line 1: | Line 1: | ||
Here I will give a quick description on what I did to make the Kinect "talk" to Max MSP | '''Here I will give a quick description on what I did to make the Kinect "talk" to Max MSP''' | ||
I was working on a Macbook Pro 2015 with OS Mojave 10.14.4, and Max 7 (7.3.6) | I was working on a Macbook Pro 2015 with OS Mojave 10.14.4, and Max 7 (7.3.6) | ||
VERY IMPORTANT: | '''VERY IMPORTANT:''' | ||
The reason I worked with Max 7 (and not Max 8 or later) is that the Kinect-object does not work with Max 8... yet... | The reason I worked with Max 7 (and not Max 8 or later) is that the Kinect-object does not work with Max 8... yet... | ||
| Line 20: | Line 20: | ||
Now, the Kinect is physically connected to the Mac, and is running. There should be a green light shining on the front of the Kinect. | Now, the Kinect is physically connected to the Mac, and is running. There should be a green light shining on the front of the Kinect. | ||
What you need, to make Max 7 recognize and process the Kinect signal, you need a Max Object called | What you need, to make Max 7 recognize and process the Kinect signal, you need a Max Object called ''jit.freenect.grab''. This was developed by Jean-Marc Pelletier and two others. | ||
Find the object and more info about it and its developer right here https://jmpelletier.com/freenect/ | Find the object and more info about it and its developer right here https://jmpelletier.com/freenect/ | ||
I got my download right here https://www.notion.so/Kinect-freenect-a4268b52caa64266a48900dc489b3c2d | I got my download right here https://www.notion.so/Kinect-freenect-a4268b52caa64266a48900dc489b3c2d | ||
| Line 27: | Line 27: | ||
The easiest and quickest way to add this object to your Max Application is to copy it into your project folder. | The easiest and quickest way to add this object to your Max Application is to copy it into your project folder. | ||
Now you should be able to create a new object and type in | Now you should be able to create a new object and type in ''jit.freenect.grab''. If you look into the help file of freenect, that can be downloaded together with the object itself, you can find more things and parameters you need to get signals flowing. | ||
[[File:Bildschirmfoto 2020-07-15 um 17.42.42.png|400px]] | [[File:Bildschirmfoto 2020-07-15 um 17.42.42.png|400px]] | ||
On this picture you can see the freenect object and multiple messages that you can use to control your singal flow. | On this picture you can see the freenect object and multiple messages that you can use to control your singal flow. | ||
Most important is the | Most important is the ''qmetro 2'' object, that simply gives your patch the command to read the incoming video signal at a stready frame rate. | ||
You can also see an | You can also see an ''open'' and a ''close'' message box, the simply start or stop the video input from the kinect. | ||
With the | With the ''format rgb'' or ''format ir'' messages you can choose if you want to use the standard camera, or the infrared camera input. To change the mode, you need to press ''close'', then on the ''format ...'' message and then on ''open''. | ||
By default, the freenect outputs the normal camera input in RGB mode. | By default, the freenect outputs the normal camera input in RGB mode. | ||
The resolution of the video output is 640p x 480p. | The resolution of the video output is 640p x 480p. | ||
Right here you can see the infrared output. The screens are | Right here you can see the infrared output. The screens are ''jit.pwindow'' objects. | ||
[[File:Bildschirmfoto 2020-07-15 um 17.42.56.png|400px]] | [[File:Bildschirmfoto 2020-07-15 um 17.42.56.png|400px]] | ||
Another think that is pretty useful (and fun) is the | Another think that is pretty useful (and fun) is the ''tilt $1'' message box. By feeding the message box values from -30 to 30 you can tilt the Kinect sensor physically. | ||
Additional Fun Fact: | |||
There's a longer cable for the kinect plug available online, if you like to put the kinect a bit further away from your computer, I got mine here, works fine | |||
https://www.amazon.de/gp/product/B0040Y1LT6/ref=ppx_yo_dt_b_asin_title_o00_s00?ie=UTF8&psc=1 | |||
Latest revision as of 15:20, 22 July 2020
Here I will give a quick description on what I did to make the Kinect "talk" to Max MSP
I was working on a Macbook Pro 2015 with OS Mojave 10.14.4, and Max 7 (7.3.6)
VERY IMPORTANT: The reason I worked with Max 7 (and not Max 8 or later) is that the Kinect-object does not work with Max 8... yet...
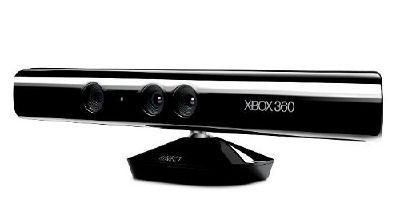
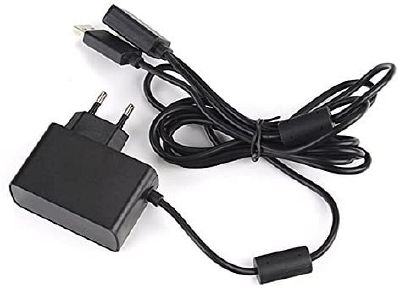
I used a Kinect 360 (the Kinect that came with the XBOX 360). The sensor has a strange looking, orange plug, that was exclusively made for the XBOX. It looks like USB, but isn't. That means, you also need an adapter to connect it to a Mac via USB. I used this one https://www.amazon.de/gp/product/B008OAVS3Q/ref=ppx_yo_dt_b_asin_title_o02_s00?ie=UTF8&psc=1
Now, the Kinect is physically connected to the Mac, and is running. There should be a green light shining on the front of the Kinect.
What you need, to make Max 7 recognize and process the Kinect signal, you need a Max Object called jit.freenect.grab. This was developed by Jean-Marc Pelletier and two others. Find the object and more info about it and its developer right here https://jmpelletier.com/freenect/ I got my download right here https://www.notion.so/Kinect-freenect-a4268b52caa64266a48900dc489b3c2d As far as I know, the object does NOT work with newer Kinect sensors, ONLY with the Kinect 360.
The easiest and quickest way to add this object to your Max Application is to copy it into your project folder.
Now you should be able to create a new object and type in jit.freenect.grab. If you look into the help file of freenect, that can be downloaded together with the object itself, you can find more things and parameters you need to get signals flowing.
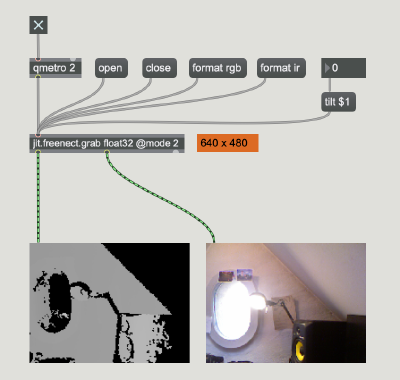
On this picture you can see the freenect object and multiple messages that you can use to control your singal flow. Most important is the qmetro 2 object, that simply gives your patch the command to read the incoming video signal at a stready frame rate. You can also see an open and a close message box, the simply start or stop the video input from the kinect. With the format rgb or format ir messages you can choose if you want to use the standard camera, or the infrared camera input. To change the mode, you need to press close, then on the format ... message and then on open. By default, the freenect outputs the normal camera input in RGB mode. The resolution of the video output is 640p x 480p.
Right here you can see the infrared output. The screens are jit.pwindow objects.
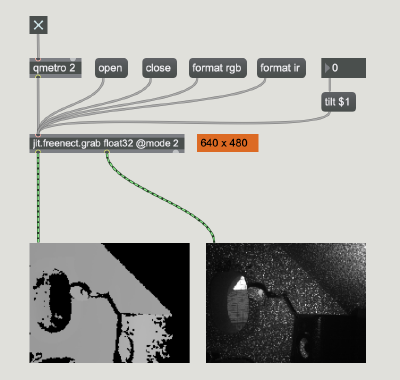
Another think that is pretty useful (and fun) is the tilt $1 message box. By feeding the message box values from -30 to 30 you can tilt the Kinect sensor physically.
Additional Fun Fact:
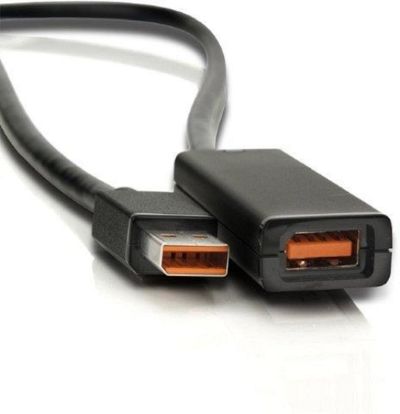
There's a longer cable for the kinect plug available online, if you like to put the kinect a bit further away from your computer, I got mine here, works fine https://www.amazon.de/gp/product/B0040Y1LT6/ref=ppx_yo_dt_b_asin_title_o00_s00?ie=UTF8&psc=1
