| (5 intermediate revisions by the same user not shown) | |||
| Line 11: | Line 11: | ||
===== Tutorial on how to install vapory on unix ===== | |||
[http://www.uni-weimar.de/medien/wiki/images/Vapory-on-osx.txt Tutorial here] | |||
=====Full code on GITHUB===== | |||
Note that you will need to source your own keys and install the necessary libraries to make it work. | |||
[https://github.com/veli2305/botsnplots Code on GitHub] | |||
===== Screenshots ===== | ===== Screenshots ===== | ||
| Line 22: | Line 29: | ||
<source lang="python"> | <source lang="python"> | ||
###LOAD LIBRARIES ### | |||
from vapory import * | from vapory import * | ||
| Line 27: | Line 36: | ||
from random import* | from random import* | ||
from PIL import Image | from PIL import Image | ||
###CREATE FUNCTION### | |||
def create_3D(): | def create_3D(): | ||
###DEFINE VARIABLES### | |||
#image.save("process.png") | #image.save("process.png") | ||
n_boxes=randint(25,34) | n_boxes=randint(25,34) | ||
| Line 35: | Line 49: | ||
distances2 = [1*j for j in range(n_boxes)] | distances2 = [1*j for j in range(n_boxes)] | ||
###CREATE BOXES AT RANDOM LOCATIONS AND ASIGN IMAGE AS MAP### | |||
box= [Box([-0.5+y/4, -0.5+x/4, -0.5],[0.5+y/4,x/4+0.5,0.5],Texture('uv_mapping', | box= [Box([-0.5+y/4, -0.5+x/4, -0.5],[0.5+y/4,x/4+0.5,0.5],Texture('uv_mapping', | ||
Pigment( ImageMap('png', '"process.png"')), | Pigment( ImageMap('png', '"process.png"')), | ||
| Line 43: | Line 57: | ||
for x in distances2 | for x in distances2 | ||
] | ] | ||
###SET UP SCENE FOR RENDERING AND SAVING THE FILE#### | |||
tt=[Background( "color", [0,0,0] )] | tt=[Background( "color", [0,0,0] )] | ||
| Line 57: | Line 73: | ||
scene.render("chessboard.png", width=500, height=400, antialiasing=0.000001, quality=9) | scene.render("chessboard.png", width=500, height=400, antialiasing=0.000001, quality=9) | ||
###tHE SCRIPT IS LOADED AND THE FUNCTION ( def create_3D ) IS CALLED FROM WITHIN THE TWITTERBOT SCRIPT ### | |||
</source> | </source> | ||
Latest revision as of 15:39, 17 October 2015
Twitter Bot
Description:
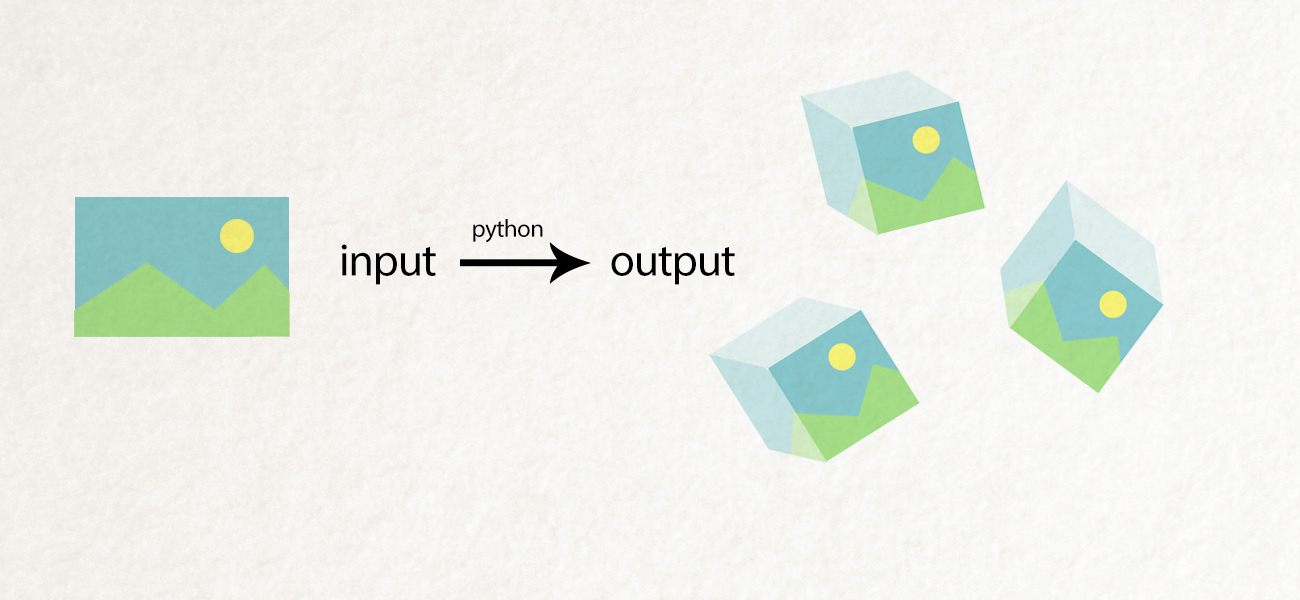
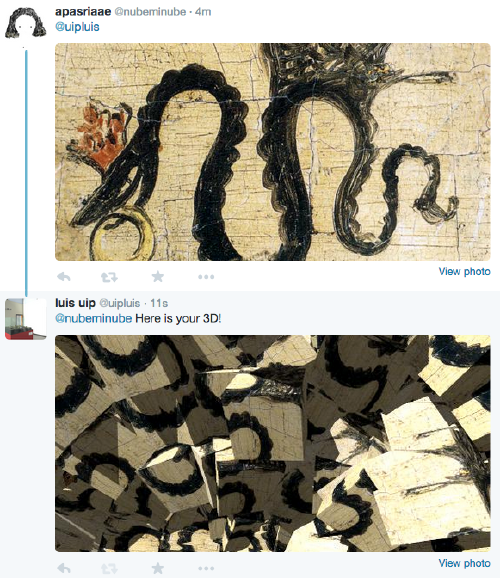
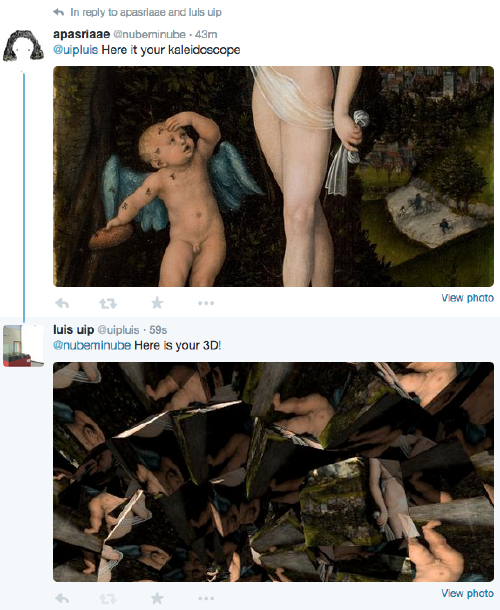
The 3Dbot takes images as input and maps them into a cube. The script creates multiple variations of these cubes changing the position and rotation of them. After doing that, the image is rendered and posted back to twitter.
The geometry is created using vapory and rendered using POVray.
Tutorial on how to install vapory on unix
Full code on GITHUB
Note that you will need to source your own keys and install the necessary libraries to make it work.
Screenshots
Source Code
###LOAD LIBRARIES ###


from vapory import *
from math import pi, sqrt, sin, cos
from random import*
from PIL import Image

###CREATE FUNCTION###

def create_3D():

###DEFINE VARIABLES###

    #image.save("process.png")
    n_boxes=randint(25,34)
    h_boxes=randint(20,30)
    distances  = [1*i for i in range(h_boxes)]
    distances2  = [1*j for j in range(n_boxes)]

###CREATE BOXES AT RANDOM LOCATIONS AND ASIGN IMAGE AS MAP###
    box= [Box([-0.5+y/4, -0.5+x/4, -0.5],[0.5+y/4,x/4+0.5,0.5],Texture('uv_mapping',
                        Pigment( ImageMap('png', '"process.png"')),
                        Finish('diffuse','albedo', 1.2)),
                        'rotate',[randrange(x,180),randrange(x,35),randrange(x,180)])
                for y in distances
                for x in distances2
                ]

###SET UP SCENE FOR RENDERING AND SAVING THE FILE####

    tt=[Background( "color", [0,0,0] )]


    sun = [LightSource([-1500,2500,-2500], 'color', [1.5,1.5,1.5])]


    scene = Scene( Camera('angle', 75,'location',  [0.7, 2,-6],'rotate',[0,-15,0]),
                      #'look_at', [0.5 , 0.5 , 0.5]),
                   objects = (box+sun+tt),
                   included = ["colors.inc", "textures.inc"],
                   defaults = [Pigment( ImageMap('png', '"cube.png"','once')),Finish( 'ambient', 0.1, 'diffuse', 0.9)] )

    scene.render("chessboard.png", width=500, height=400, antialiasing=0.000001, quality=9)

###tHE SCRIPT IS LOADED AND THE FUNCTION ( def create_3D ) IS CALLED FROM WITHIN THE TWITTERBOT SCRIPT ###
Veli2305 15:52, 16 June 2015 (UTC)
Comments
Wow. Breaking the twitter wall :) Very good job.
You are really taking twitterbots to the next dimension!
— Martin Schneider 13:03, 17 June 2015 (UTC)
Animated Processing Bot
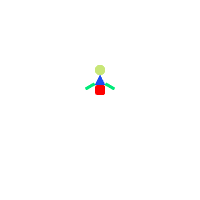
Processing Bot
def setup():
    size(400,400)
    background(0)
    frameRate(10)
def draw():
    a = random(2,3)
    background(0)
    noStroke()
    pushMatrix()
    translate(frameCount/-4,frameCount/random(-1.5,-1))
    fill(200,230,120)
    ellipse(200,200,20,20)
    fill(255,0,0)
    rect(190,230,20,20,7)
    fill(30,78,240)
    triangle(190,230,200,210,210,230)
    pushMatrix()
    fill(0,233,120)
    translate(210,230)
    rotate(-PI/a)
    rect(0,0,5,20)

    popMatrix()
    pushMatrix()
    fill(0,233,120)


    translate(190,230)
    scale(-1,1)
    rotate(-PI/a)
    rect(0,0,5,20)


    popMatrix()
    popMatrix()

    fill(255,random(50,250))
    ellipse(20,frameCount,2,2)
    ellipse(50,frameCount*2,2,2)
    ellipse(60,frameCount*3,2,2)
    fill(255,random(50,250))
    ellipse(80,frameCount*1.5,2,2)
    ellipse(120,frameCount/2,2,2)
    ellipse(150,frameCount/4,2,2)
    fill(255,random(50,250))
    ellipse(160,frameCount*2,2,2)
    ellipse(180,frameCount*2,2,2)
    ellipse(220,frameCount/2,2,2)
    fill(255,random(50,250))
    ellipse(250,frameCount/4,2,2)
    ellipse(260,frameCount*2,2,2)
    ellipse(280,frameCount/2,2,2)
    fill(255,random(50,250))
    ellipse(320,frameCount/4,2,2)
    ellipse(350,frameCount*3,2,2)
    fill(255,random(50,250))
    ellipse(360,frameCount*1.3,2,2)
    ellipse(380,frameCount*1.2,2,2)


    saveFrame("koala.png")


