No edit summary |
No edit summary |
||
| (17 intermediate revisions by the same user not shown) | |||
| Line 1: | Line 1: | ||
'''ASSIGNMENT I - IMPROBABLE SWICHT ''' | |||
[[File: | ---- | ||
[[File:pinballswich1.jpg]] | |||
Ayla and me decided to make "simple pinball switches" in a box | Ayla and me decided to make "simple pinball switches" in a box | ||
| Line 11: | Line 13: | ||
help of some alligator clips we connected every obstacle on the inner side with | help of some alligator clips we connected every obstacle on the inner side with | ||
some copper wire to the breadboards. | some copper wire to the breadboards. | ||
[[File:pinballswich7.jpg]] | |||
So each obstacle was one part of the switch. The circuit was closed when the ball | So each obstacle was one part of the switch. The circuit was closed when the ball | ||
that was wrapped in aluminium foil touched the positive and the negative part of | that was wrapped in aluminium foil touched the positive and the negative part of | ||
the obstacle. | the obstacle. | ||
[[File:pinballswich8.jpg]] | |||
Because the speakers were inside the box, the sounds were a bit silent so we made | Because the speakers were inside the box, the sounds were a bit silent so we made | ||
some holes on the sides of the box and also some smaller ones on the board itself. | some holes on the sides of the box and also some smaller ones on the board itself. | ||
While building we realized that it's always that you have to think about how to attach something to another part, make it stiff or make it flexible, | |||
[[File:pinballswich3.jpg]] | |||
While building we realized that it's always that you have to think about how to attach something to another part, make it stiff or make it flexible, also. | |||
Inside the machine, we worked with five 555 timers in two different breadboards. | Inside the machine, we worked with five 555 timers in two different breadboards. | ||
The main constructions was the same but the values were varying in relation to different values of the resistors between the pins 6-7 and 7-8 and the capacitors between pins 1-2 and 3. | The main constructions was the same but the values were varying in relation to different values of the resistors between the pins 6-7 and 7-8 and the capacitors between pins 1-2 and 3. | ||
[[File:pinballswich4.jpg]] | |||
Circuits: | |||
1 ) R2 : 1 M ohm 2) R2: 10K ohm 3) R2: 100K ohm | |||
R1 : 100 K ohm R1: 10K ohm R1: 10K ohm | |||
1 - 2 :0.1 μF 1 - 2 : 0.1 μF 1 - 2 : 0.1 μF | |||
3: 1μF 3: 47μF 3: 100μF | |||
4) R2 : 1K ohm 5) R2 : 10 K ohm | |||
R1 : 1 K ohm R1 : 100 K ohm | |||
1 - 2 : 0.1μF 1 - 2 : 0.1μF | |||
3: 22 μF 3: 47μF | |||
[[File:pinballswich5.jpg]] | |||
---- | |||
'''ASSIGNMENT II - CONCEPTUAL SENSOR ''' | |||
---- | |||
[[File: Sensor.jpg]] | |||
On this one I was instructed to open the pin 6 and 7 on Astable Mode in 555Timer and play with, plus that with a serie of 555Timer Circuit we are able to modulate the sounds better. | |||
So I worked on my circuit and have decided to work with 3 555Timers connected. The first circuit was used light sensors and the second was used graffiti on a paper as a sensor table. | |||
[[File: Paper.jpg]] | |||
On the first circuit from the pin 6 was opened 2 channel where different resistors was connected with the LDR and after connected with pin 7. | |||
[[File: Circuit4.jpg]] | |||
On the second circuit, was opened 3 channels where each one also had a different resistor value connected with the paper. | |||
[[File: Circuito.jpg]] | |||
The values are: | |||
The result is that the variations of sound was even greater than the expected cause now it was able to work with 5 variables. | |||
Video showing how it works | |||
https://vimeo.com/163918452 | |||
---- | |||
'''FINAL PROJECT - The Sounds Of Changes ''' | |||
---- | |||
[[File: Articulando.jpg]] | |||
Experimenting more with the 555Timer, it was realised that if is opened the pin 8 besides the pins 6 and 7 , it also was possible play sounds frequencies. | |||
So, as on the preview experiences I opened again channels at pins 6 and in 7 but now with 4 resistors in it. | |||
To make some fun i opened also 3 channels at pin 8 but connecting with different values capacitors. On the picture yellow tape represents pin 8, and green and blue pint 6 and 7 respectively. | |||
[[File: fabric.jpg]] | |||
It was stitched lines of conductive yarn on the fabric and at each line has a resistor or a capacitor. | |||
Thus, each line connects with one of those 3 wires that was sewed in a strip fabric which were plugging one of the pins. | |||
[[File: strip with 3 wires.jpg]] | |||
Inside a bag was set up the circuit and out side the speaker. | |||
[[File: bag with the circuit.jpg]] | |||
Video of the First test | |||
https://vimeo.com/163918560 | |||
Video of the Result | |||
https://vimeo.com/159437385 | |||
Latest revision as of 18:23, 23 April 2016
ASSIGNMENT I - IMPROBABLE SWICHT
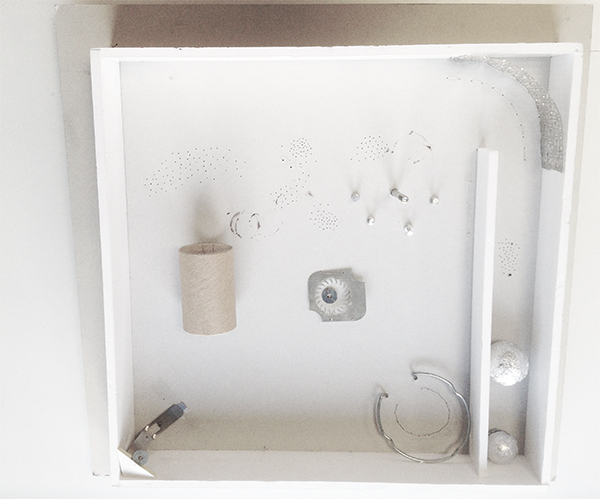
Ayla and me decided to make "simple pinball switches" in a box
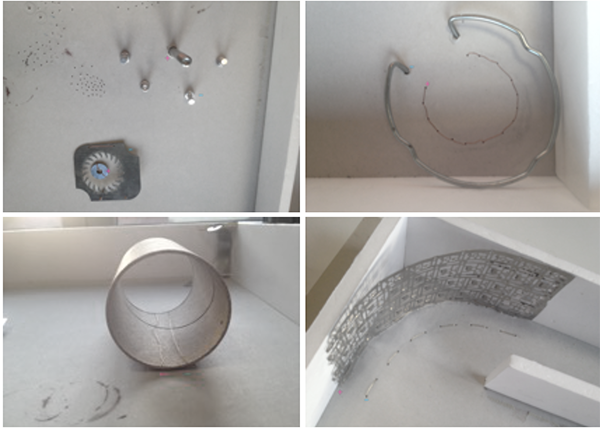
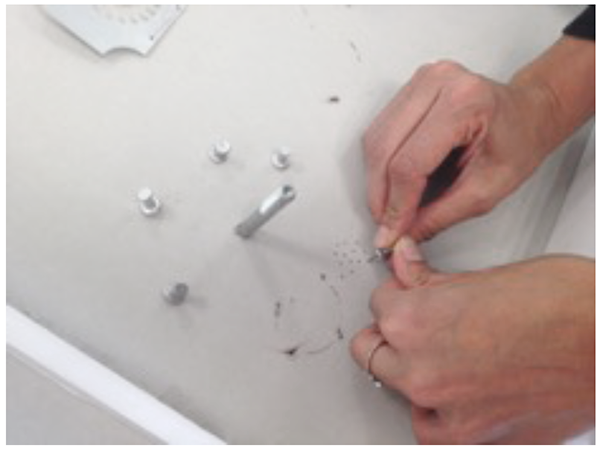
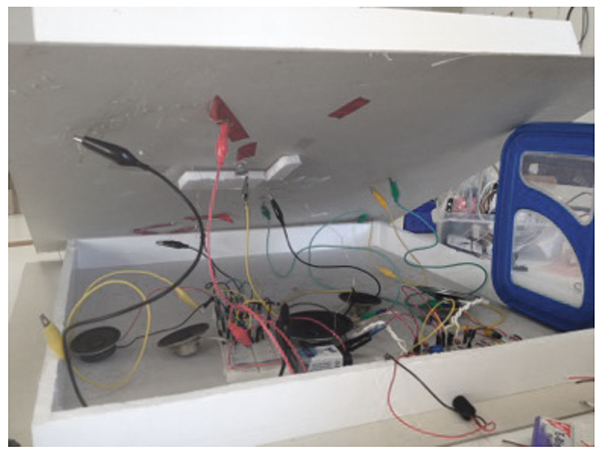
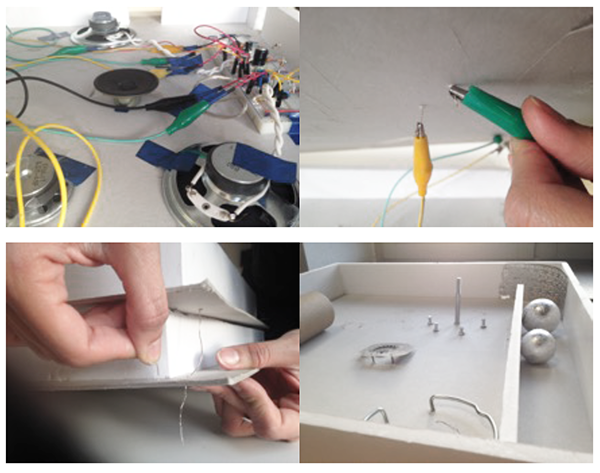
We went through some trash bins on the campus and found some thicker cardboard boxes, probably used by architecture students. We also found some conductive materials that were our six obstacles aka our six switches. Between the two cardboard boxes we put two breadboards that were creating five sounds. With the help of some alligator clips we connected every obstacle on the inner side with some copper wire to the breadboards.
So each obstacle was one part of the switch. The circuit was closed when the ball that was wrapped in aluminium foil touched the positive and the negative part of the obstacle.
Because the speakers were inside the box, the sounds were a bit silent so we made some holes on the sides of the box and also some smaller ones on the board itself.
While building we realized that it's always that you have to think about how to attach something to another part, make it stiff or make it flexible, also.
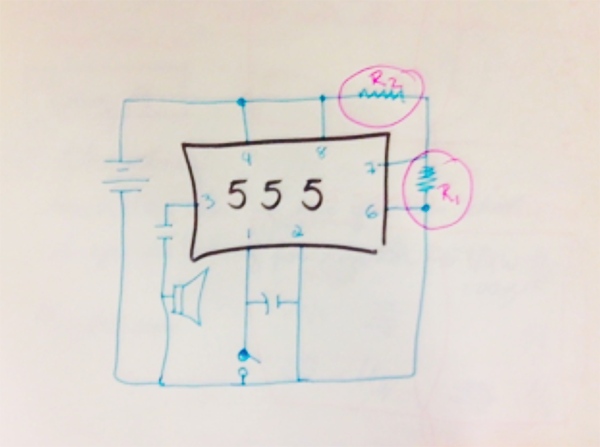
Inside the machine, we worked with five 555 timers in two different breadboards.
The main constructions was the same but the values were varying in relation to different values of the resistors between the pins 6-7 and 7-8 and the capacitors between pins 1-2 and 3.
Circuits: 1 ) R2 : 1 M ohm 2) R2: 10K ohm 3) R2: 100K ohm R1 : 100 K ohm R1: 10K ohm R1: 10K ohm 1 - 2 :0.1 μF 1 - 2 : 0.1 μF 1 - 2 : 0.1 μF 3: 1μF 3: 47μF 3: 100μF 4) R2 : 1K ohm 5) R2 : 10 K ohm R1 : 1 K ohm R1 : 100 K ohm 1 - 2 : 0.1μF 1 - 2 : 0.1μF 3: 22 μF 3: 47μF
ASSIGNMENT II - CONCEPTUAL SENSOR
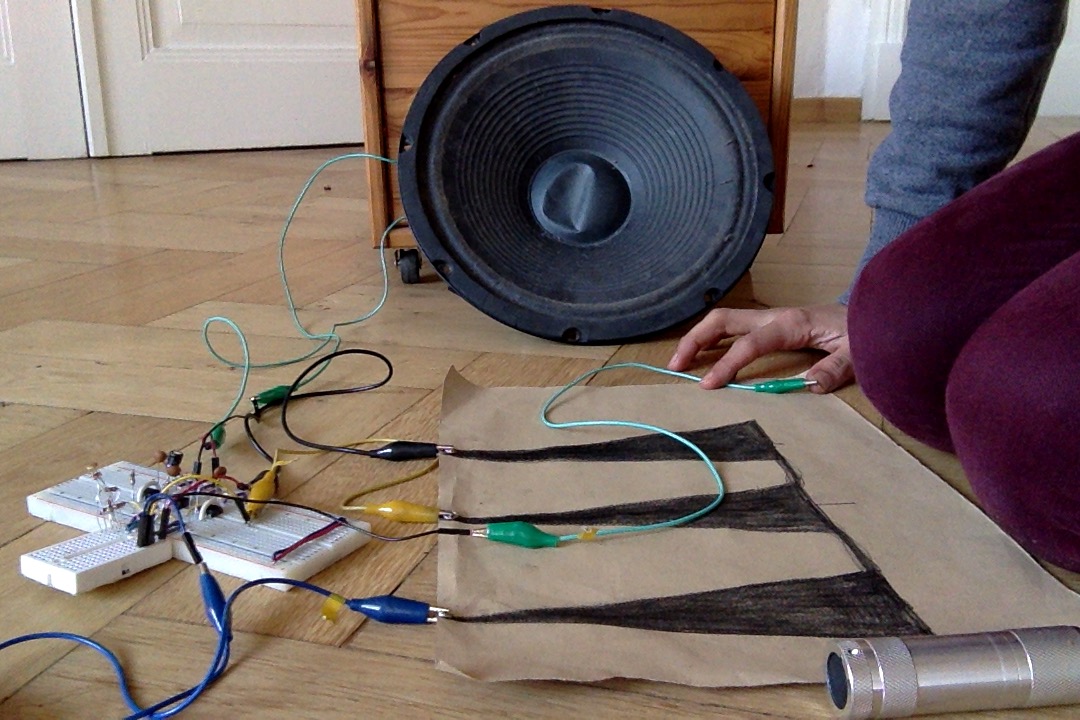
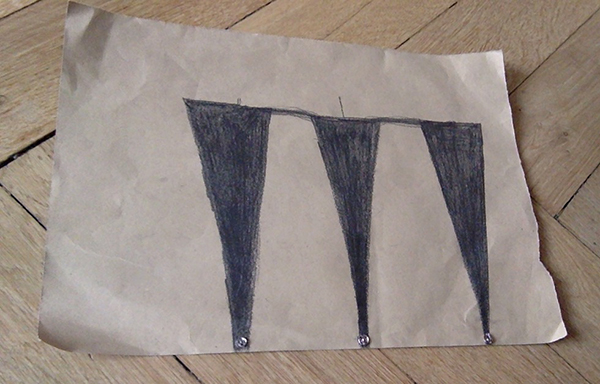
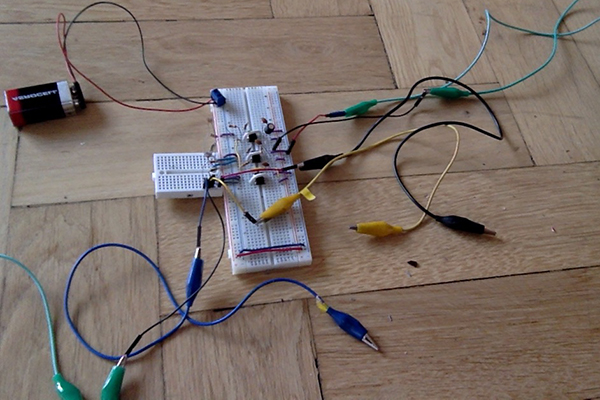
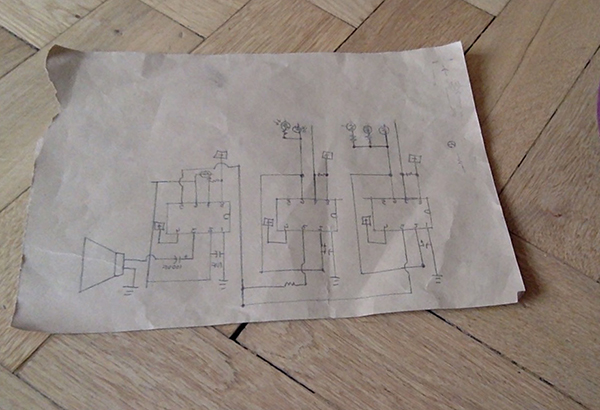
On this one I was instructed to open the pin 6 and 7 on Astable Mode in 555Timer and play with, plus that with a serie of 555Timer Circuit we are able to modulate the sounds better. So I worked on my circuit and have decided to work with 3 555Timers connected. The first circuit was used light sensors and the second was used graffiti on a paper as a sensor table.
On the first circuit from the pin 6 was opened 2 channel where different resistors was connected with the LDR and after connected with pin 7.
On the second circuit, was opened 3 channels where each one also had a different resistor value connected with the paper.
The values are:
The result is that the variations of sound was even greater than the expected cause now it was able to work with 5 variables.
Video showing how it works https://vimeo.com/163918452
FINAL PROJECT - The Sounds Of Changes
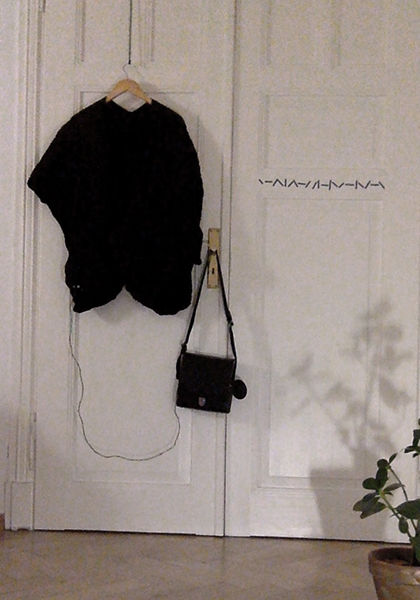
Experimenting more with the 555Timer, it was realised that if is opened the pin 8 besides the pins 6 and 7 , it also was possible play sounds frequencies.
So, as on the preview experiences I opened again channels at pins 6 and in 7 but now with 4 resistors in it.
To make some fun i opened also 3 channels at pin 8 but connecting with different values capacitors. On the picture yellow tape represents pin 8, and green and blue pint 6 and 7 respectively.
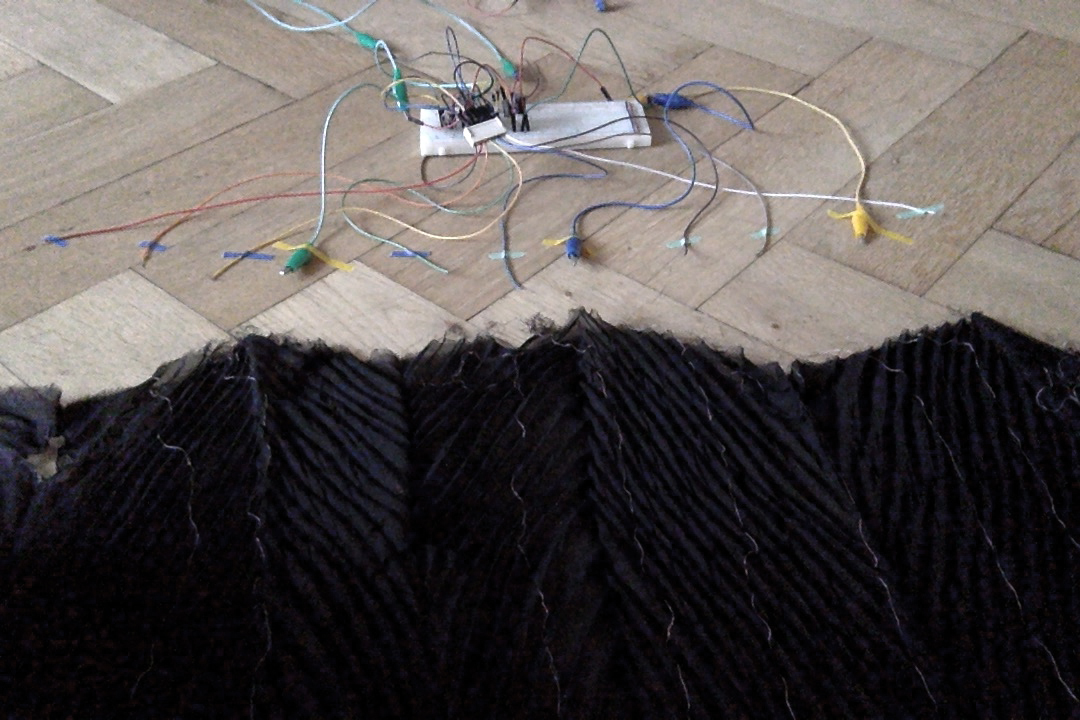
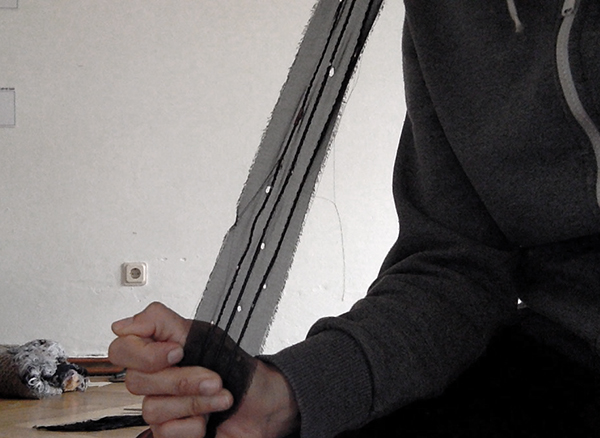
It was stitched lines of conductive yarn on the fabric and at each line has a resistor or a capacitor. Thus, each line connects with one of those 3 wires that was sewed in a strip fabric which were plugging one of the pins.
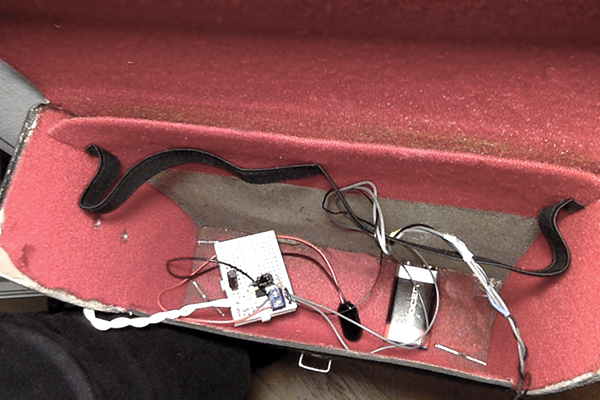
Inside a bag was set up the circuit and out side the speaker.
Video of the First test https://vimeo.com/163918560 Video of the Result https://vimeo.com/159437385
