GMU:Tutorials/Performance Platform/Tracking Platform Calibration: Difference between revisions
(add image descriptions) |
(fixed screenshot formatting) |
||
| (2 intermediate revisions by one other user not shown) | |||
| Line 32: | Line 32: | ||
[[Image:DBL-setup.png|thumb|left|800px]] | [[Image:DBL-setup.png|thumb|left|800px]] | ||
<br style="clear:both"> | <br style="clear:both"> | ||
[[Image:camera-close.png|thumb|left|150px|CLOSER LOOK AT A CAMERA]] | <div style="float:left;">[[Image:camera-close.png|thumb|left|150px|CLOSER LOOK AT A CAMERA]]</div> | ||
[[Image:calibration-board.png|thumb|left|300px|CALIBRATION BOARD]] | <div style="float:left;">[[Image:calibration-board.png|thumb|left|300px|CALIBRATION BOARD]]</div> | ||
[[Image:switch.png|thumb|left|265px|SWITCH]] | <div style="float:left;">[[Image:switch.png|thumb|left|265px|SWITCH]]</div> | ||
<br style="clear:both"> | <br style="clear:both"> | ||
| Line 42: | Line 42: | ||
Turn on the computer on the left side and login. On this workstation you have the advantage to use a second monitor. <br> It's useful for the person, that is on stage and wants to see itself while calibrating the cameras or performing something. <br> In case you do not know the password for the user login, ask a person who does. If you managed the login, the desktop appears. <br> You have to start the tracking software with the help of the command line. That is probably the nerdiest part of the calibration process. ;) <br> '''Hint:''' We do have two different versions of [http://www.thecaptury.com The Captury] installed on the Macs. If you want to work with the old version, type now in the command line ''captury'' in lowercase letters. If you want to work with the new version, type now ''captury-new'' in the command line. <br> Please wait a moment until the program is ready for working with it. Yes, it's that easy! <br> | Turn on the computer on the left side and login. On this workstation you have the advantage to use a second monitor. <br> It's useful for the person, that is on stage and wants to see itself while calibrating the cameras or performing something. <br> In case you do not know the password for the user login, ask a person who does. If you managed the login, the desktop appears. <br> You have to start the tracking software with the help of the command line. That is probably the nerdiest part of the calibration process. ;) <br> '''Hint:''' We do have two different versions of [http://www.thecaptury.com The Captury] installed on the Macs. If you want to work with the old version, type now in the command line ''captury'' in lowercase letters. If you want to work with the new version, type now ''captury-new'' in the command line. <br> Please wait a moment until the program is ready for working with it. Yes, it's that easy! <br> | ||
[[Image:captury-start.png|thumb|left|270px|START THE CAPTURY VIA COMMAND LINE]] | <div style="float:left;">[[Image:captury-start.png|thumb|left|270px|START THE CAPTURY VIA COMMAND LINE]]</div> | ||
[[Image:two-monitors.png|thumb|left|530px|YOUR WORKSTATION]] | <div style="float:left;">[[Image:two-monitors.png|thumb|left|530px|YOUR WORKSTATION]]</div> | ||
<br style="clear:both"> | <br style="clear:both"> | ||
'''STEP 02 – Check The Live Preview Of The Cameras''' <br> | '''STEP 02 – Check The Live Preview Of The Cameras''' <br> | ||
| Line 60: | Line 61: | ||
If you are not happy with the brightness of the camera preview, you can either change the ''Global Brightness'' or the ''Current Camera Brightness'' of the camera, that is orange framed. Make sure the background is neither too bright and nor too dark. <br> | If you are not happy with the brightness of the camera preview, you can either change the ''Global Brightness'' or the ''Current Camera Brightness'' of the camera, that is orange framed. Make sure the background is neither too bright and nor too dark. <br> | ||
[[Image:bright.png|thumb|left|400px|TOO BRIGHT + TOO DARK]] | <div style="float:left;">[[Image:bright.png|thumb|left|400px|TOO BRIGHT + TOO DARK]]</div> | ||
[[Image:okay.png|thumb|left|400px|OKAY]] | <div style="float:left;">[[Image:okay.png|thumb|left|400px|OKAY]]</div> | ||
<br style="clear:both"> | <br style="clear:both"> | ||
| Line 72: | Line 73: | ||
Do this job properly. Otherwise you regret it later while tracking somebody. <br> | Do this job properly. Otherwise you regret it later while tracking somebody. <br> | ||
[[Image:one-camera.png|thumb|left|400px|INTRINSICS LIVE PREVIEW OF ONE CAMERA]] | <div style="float:left;">[[Image:one-camera.png|thumb|left|400px|INTRINSICS LIVE PREVIEW OF ONE CAMERA]]</div> | ||
[[Image:all-cameras.png|thumb|left|400px|INTRINSICS LIVE PREVIEW OF ALL CAMERAS]] | <div style="float:left;">[[Image:all-cameras.png|thumb|left|400px|INTRINSICS LIVE PREVIEW OF ALL CAMERAS]]</div> | ||
<br style="clear:both"> | <br style="clear:both"> | ||
Latest revision as of 19:04, 22 October 2016
For Your Information
If you want to have a proper tracking of a person, an animal or another thing you have to calibrate the Tracking System at first.
This includes the calibration of the background and the calibration of the cameras.
Follow this Step by Step tutorial for Calibrating the Tracking System!
Prepare Yourself And The Stage
Before starting with the calibration process, follow a few simple rules:
1. Make sure to close the curtains (and windows) in the DBL (if the light situation changes while calibrating, you have to capture the background again)
2. Take off your shoes, if you want to step on the light grey dancefloor aka magic carpet
3. Keep drinks and food away from the Mac workstations and all the other electronic stuff in the DBL
4. Do NOT barge against the cameras or the autopoles, where the cameras are fixed (otherwise you have to calibrate them again or in the worst case: You destroy something!)
The Tracking System is still a little buggy. So keep calm and be patient while working with it. Bugs are getting fixed as soon as possible.
If you notice a bug, please write a bug report (a detailed How-To-Bug-Report can be found here) and contact Nils Hasler, he is the CEO of TheCaptury
and inform Martin Schneider.
Last but not least
– It's easier and more fun, if you bring a another person, who can help you with the calibration and on whom you can check, whether your calibration is good enough for a proper tracking. Preferably the performing person should wear bright/colorful and/or short clothes. This makes the detection of the performer later much easier. :)
Setup Of The DBL
In the panorama you can see the setup of the DBL:
- 12 cameras (numbered from 1 to 12), which are fixed on Autopoles (blue framed)
- the dancefloor aka magic carpet (number 13)
- the video wall (number 14)
- the powerboard to turn on the cameras and the switch, where the cameras are plugged in (red framed)
- the 4 workstations in the foreground
And of course you need the calibration board!
Let's Calibrate!
STEP 01 – Login And Start The Captury
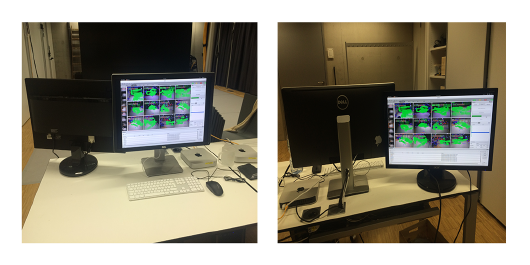
Turn on the computer on the left side and login. On this workstation you have the advantage to use a second monitor.
It's useful for the person, that is on stage and wants to see itself while calibrating the cameras or performing something.
In case you do not know the password for the user login, ask a person who does. If you managed the login, the desktop appears.
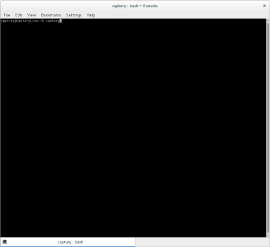
You have to start the tracking software with the help of the command line. That is probably the nerdiest part of the calibration process. ;)
Hint: We do have two different versions of The Captury installed on the Macs. If you want to work with the old version, type now in the command line captury in lowercase letters. If you want to work with the new version, type now captury-new in the command line.
Please wait a moment until the program is ready for working with it. Yes, it's that easy!
STEP 02 – Check The Live Preview Of The Cameras
In the best case you will see an overview and a live preview of what all the 12 cameras see on the dancefloor. But sometimes it happens, that instead of the preview a grey screen is displayed. Do not worry about that. Either you wait a moment and it will fix on it's own or you rightclick in the left column named CameraPreview on the buggy camera, disconnect and reconnect it. Mostly this works. But attention – If this happens while you are calibrating, DO NOT disconnect the camera. Otherwise you have to do whole calibration again!
If you take a quick look at the the program, you see all 12 cameras hopefully in the right order. But sometimes it happens, that this is not the case. Change this with double clicking on the camera, that is in the wrong position. You will notice, that with double clicking you also make a fullscreen of this specific camera. Double click again to exit this fullscreen and go back to the overview of all cameras. In the best case the cameras are now in the right order.
Maybe you will also notice that in the upper right corner mostly everything is red or yellow-ish.
Our goal is to make the status icon of calibration and background green.
STEP 03 – Calibrate The Background
A good background calibration is advisable. Make sure you closed the curtains!
Then click in the navigationbar on CAMERASETTINGS. On the right side a window appears, where you can check them.
If you are not happy with the brightness of the camera preview, you can either change the Global Brightness or the Current Camera Brightness of the camera, that is orange framed. Make sure the background is neither too bright and nor too dark.
If you think it's okay, close the camerasettings tab and click on CALIBRATION in the navigationbar. Again a window on the right side appears and you can read the words INTRINSICS, EXTRINSICS and BACKGROUND. At first you have to click on Background and then click on Capture Background. In the best case, the red little status icon next to Background turns green. If not – change the brightness.
A little hint: If you are struggling with the program, you can click on the little i button next to the cog on the right side in the tabs.
There you get a few informations and it will hopefully solve your questions or problems.
STEP 04 – Calibrate Intrinsics
There you can calibrate the lens parameters of the cameras. Normally it has to be done only once.
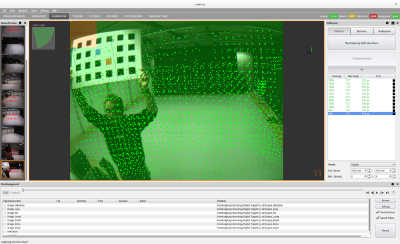
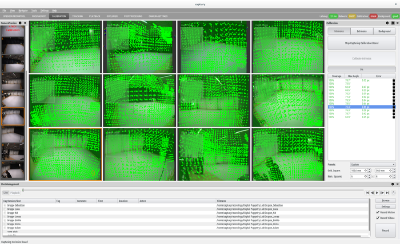
Take the calibration board and press Capture Calibration Board to start detecting the board. Go to every camera and hold the board parallel to the camera, that it fills the view or move it around so that the whole view is covered. Also hold the board at an angle to the camera for estimating the focal length of the camera. If you want to cancel the calibration press Cancel Calibration. Press Stop Capturing Calibration Board, if you think you are ready with moving around. For deleting individual camera detections, click on the trash icon. If you are a good calibrator, you can see in the live preview of the cameras that it's all covered in green with a coverage of (nearly) 100% and a good angle for each camera.
Do this job properly. Otherwise you regret it later while tracking somebody.
STEP 05 – Calibrate Extrinsics
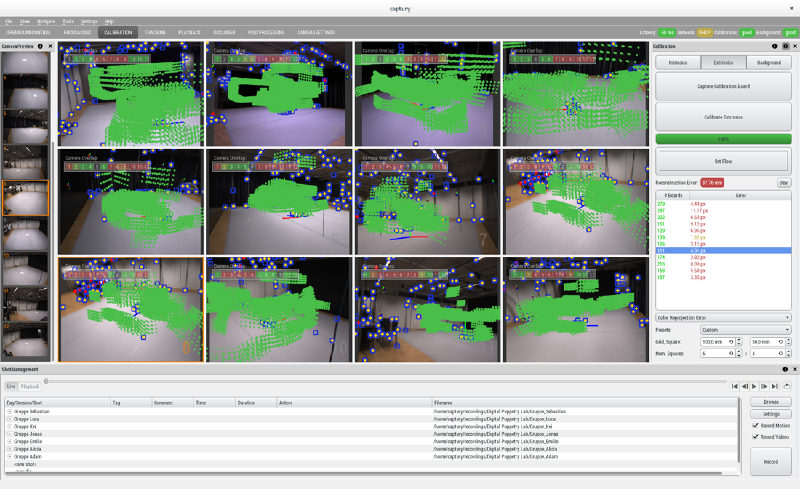
There you can calibrate the position and orientations of the cameras. Take the Calibration Board again and press Capture Calibration Board to start detecting the board. Walk around on the floor in a circular shape while making sure that the board is visible simultaneously by as many cameras as possible. Try to not have you hands on the front of the calibration board. Ideally the correct cameras should overlap. You can check this in the window for each camera. On the upper left is a bar named Camera Overlap'. You're on the right way when the cameras that are next to each other are colored green. The detected points should also turn green. If this is not the case and you're not happy with the result – Do it again. But if it worked – press Stop Capturing Calibration Board. If you and want to cancel the calibration press Cancel Calibration.
STEP 06 – Set Floor
If you finished the calibration, put the board on the floor, while take care of the axis and press Set Floor to set the coordinate system and the floor plane. Should the board not be detected immediately try changing the global brightness or move the board around on the floor.
STEP 07 – Save Your Calibration And Test It
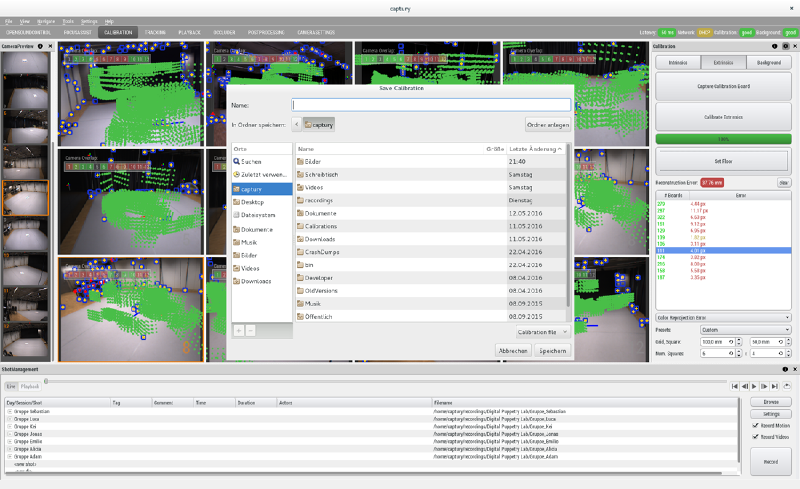
If you are done with the calibration and calibration and background has a green status icon, you can save your calibration with File > Save Calibration.
Maybe you want to work with your calibration on another day, then you can also load it with File > Load Calibration.
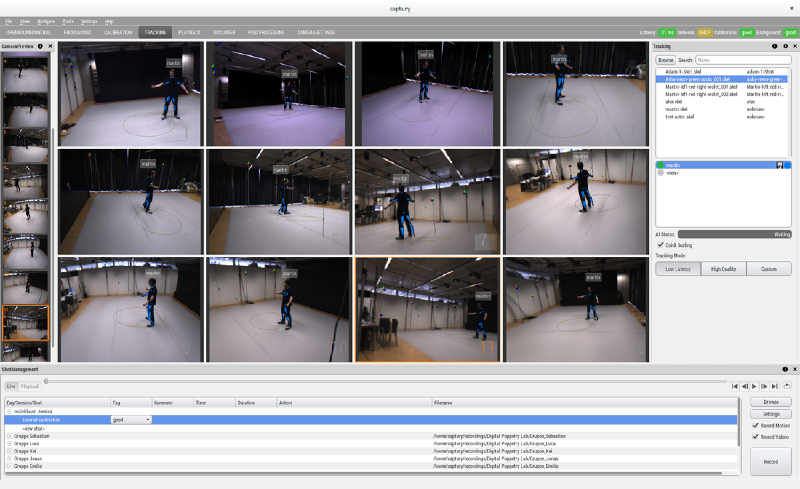
Click in the navbar on TRACKING for testing your calibration. In the bottom you can create a folder or a shot for your test-tracking.
– But if you are interested in learning how to track one or more people you should better take a look at this detailed tutorial.
If you did a good job in calibrating, the skeleton in the tracking should detect the person on the floor quite easy. :)
A last hint: If you notice, that your performer and/or you are part of the few undetectable persons, don't be sad and make sure you wear something bright and colorful to improve the detection. In the worst case, you have to ask somebody else, who can be detected by the system!


