Here you find learning material in the form of circuit simulations, that lead you to the understanding of amplifiers and other signal conditioning circuits that we use throughout the course. Feel free to experiment with them, they are editable and saved via the encoded URL. You cannot destroy them and it is easy to share edited versions. Here is an introduction to the circuit simulator.
- The foundation of understanding electric circuits is Ohm's law.
- We can calculate series and parallel resistances with Ohm's law:
series and parallel resistances
- A very powerful concept is the voltage divider, it allows us to attenuate (but not amplify!) any voltage in any circuit
voltage divider with even resistors
Amplifiers (and Attenuators)
- We will use the OpAmp (=operational amplifier) to amplify the small signals from our microphones to usable and less noisy signals before we digitize them in the computer. The opamp (= operational amplifier) is a three port device and its circuit diagram is a triangle. It has a positive and a negative input terminal and an output terminal. The most basic opamp circuit is the "comparator".
- the opamp's output can also directly follow one of its input voltages, but providing more current. This is the basis building block of opamp based amplifiers and is called "voltage follower" or "buffer".
stabilized opamp as a source follower
- once you provide a voltage divider circuit in the feedback loop of an voltage follower, you are able to control the gain of the output port. This means the voltage of the output can be a scaled version of the input, either attenuating or amplifying the input voltage. Depending on whether the voltage divider is applied on the positive or negative input, the output is an inverted or non-inverted version of the input voltage. The two basic building blocks are shown below.
Oscillators
- We can use a special configuration of the Opamp together with a capacitor as a simple oscillator. The following simulation is a square wave oscillator. At the positive input terminal, there is a voltage divider, that divides down the output of the opamp in half. Since it is positive feedback, the opamp will drive to the maximum point, which in our case is +-15V. The voltage divider divides this voltage down to half. Depending on whether the output drives high or low, the voltag at the positive input is thus +-7.5V. The capacitor gets constantly charged and discharged from the output of the opamp through the resistor. The voltage at the capacitor on the negative input compares to this threshold voltage and inverts the signal when it exceeds the respective treshold. Since this process is endlessly repeating, the output oscillates. The frequency is dependend on the size of the capacitor and the resistance of the negative feedback resistor.
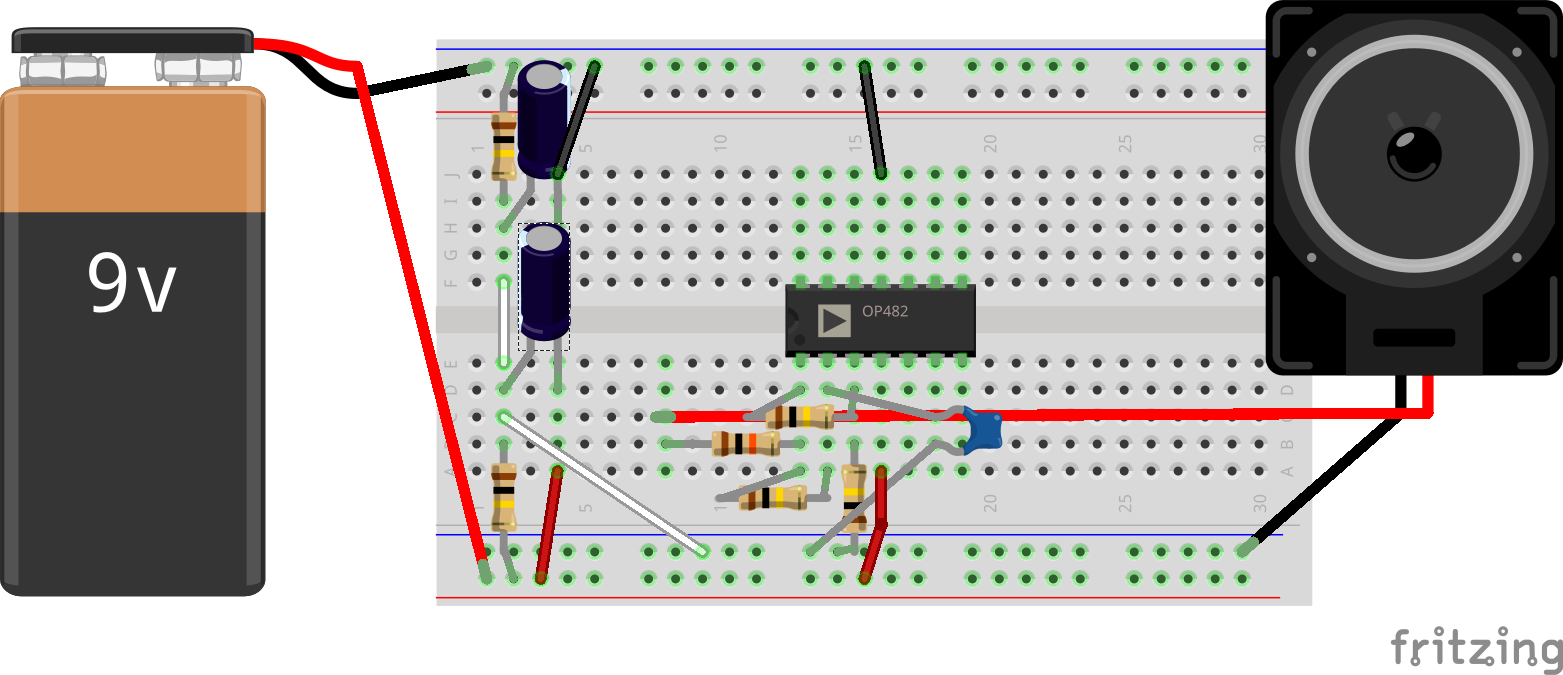
 This is the breadboard version of the square wave oscillator. The output frequency should be around 50-100Hz. You can connect this to a small speaker or headphone directly. To connect it to a Hifi amplifier input, you need to convert the output voltage from around +-4V to +-1V by using a voltage divider, as shown in the second version with the potentiometer. In this circuit I use the 4-band resistor color marking.
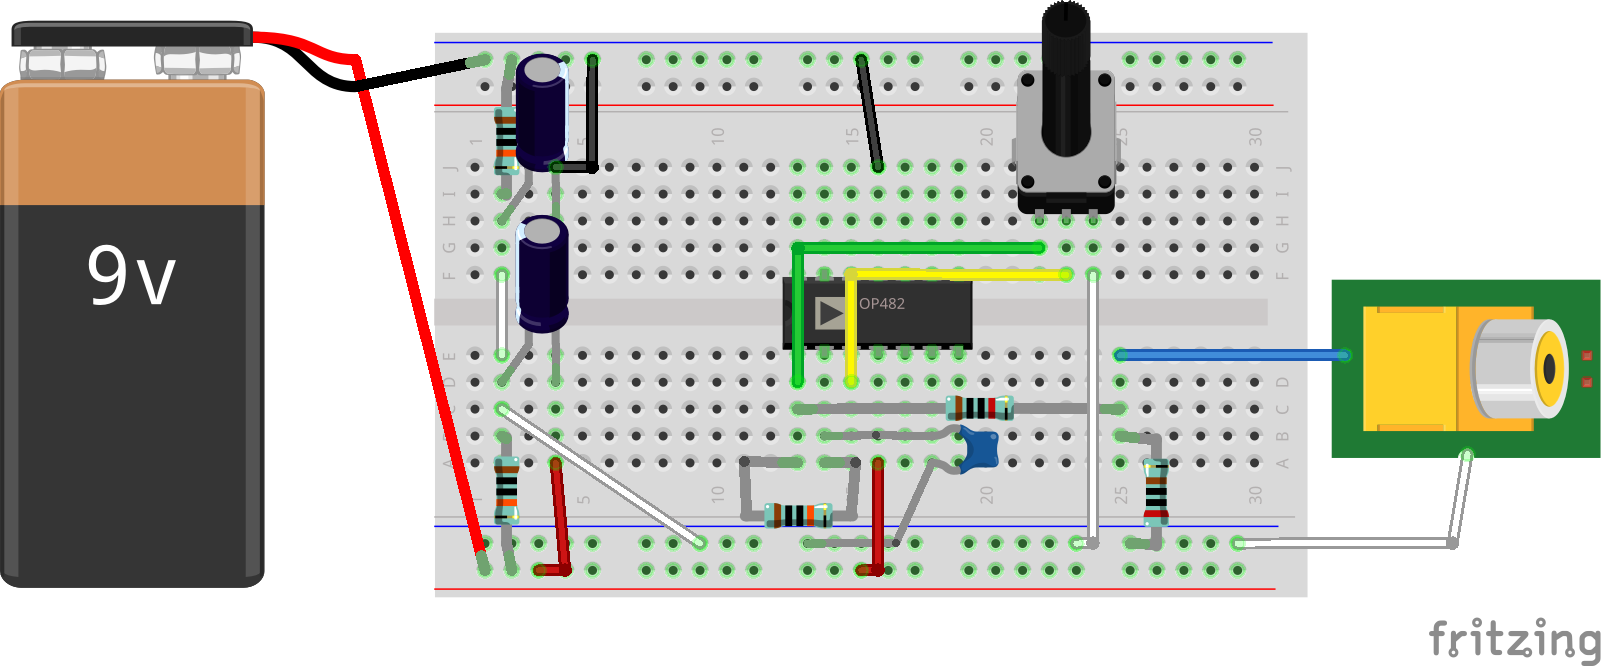
 This is the breadboard version of the square wave oscillator with potentiometer and output to +-1V (suitable for a hifi input (aux)). The output frequency varies with the potentometer. In this circuit you will find the 5-band resistor color marking. Beware: the output voltage divider before the cinch (RCA) connector is a 10kOhm and a 2kOhm resistor. Anything approximate in a 5:1 Ratio should do the trick and attenuate the output voltage below +-1V.
Filters
- To shape the spectrum of our oscillators we will use a lowpass filter. The simplest form of a lowpass filter is the passive lowpass filter. You can view this lowpass filter as an elaborated voltage divider: the capacitor has a frequency dependent resistance (which we call an impedance). This impedance is very high for static voltages (DC) and low frequencies. The impedance goes down the higher the frequency is at its input. The higher the frequency, the lower the impedance at the capacitor and the lower will be the voltage at the capacitor. This will effectively filter out high frequencies and leave lower frequencies in the signal.
- The passive low pass filter has the same disadvantage as the voltage divider: the output cannot be loaded without changing its characteristics. To prevent this, we can just put a buffer at the output of the low pass filter.
- Still, since the resistance of our source adds to our first resistor, the cutoff point will change, when the resistance of the source changes. To mitigate this we can change the topologie of our filter like so:
- Unfortunately we can't set the cutoff frequency independently of the gain of our filter with just one resistor (e.g. a potentiometer). With another filter topology, the "bridged T low pass filter", we can tune the filter without changing its gain. To get a bridged T filter, we exchange the capacitor in the feedback loop with two capacitors in series and add a resistor.
- modifiying the capacitor and resistor values, we can use a 100k potentiometer to have a variable cutoff frequency filter
Trianlge / Saw Generator Lin Freq CV
Trianlge / Saw Generator Exp Freq CV